Running the mall
Multiple locations
Run more than one building as one mall: one website, one login for every staff member and dealer, one set of payouts, and reports that show the buildings combined or side by side.
Add a location
Back office → Locations (needs Change mall settings). Each location has a name, a short name (used on receipts and labels), address, phone, hours, and its own sales tax rate — leave the rate blank to use the mall-wide rate from Settings.
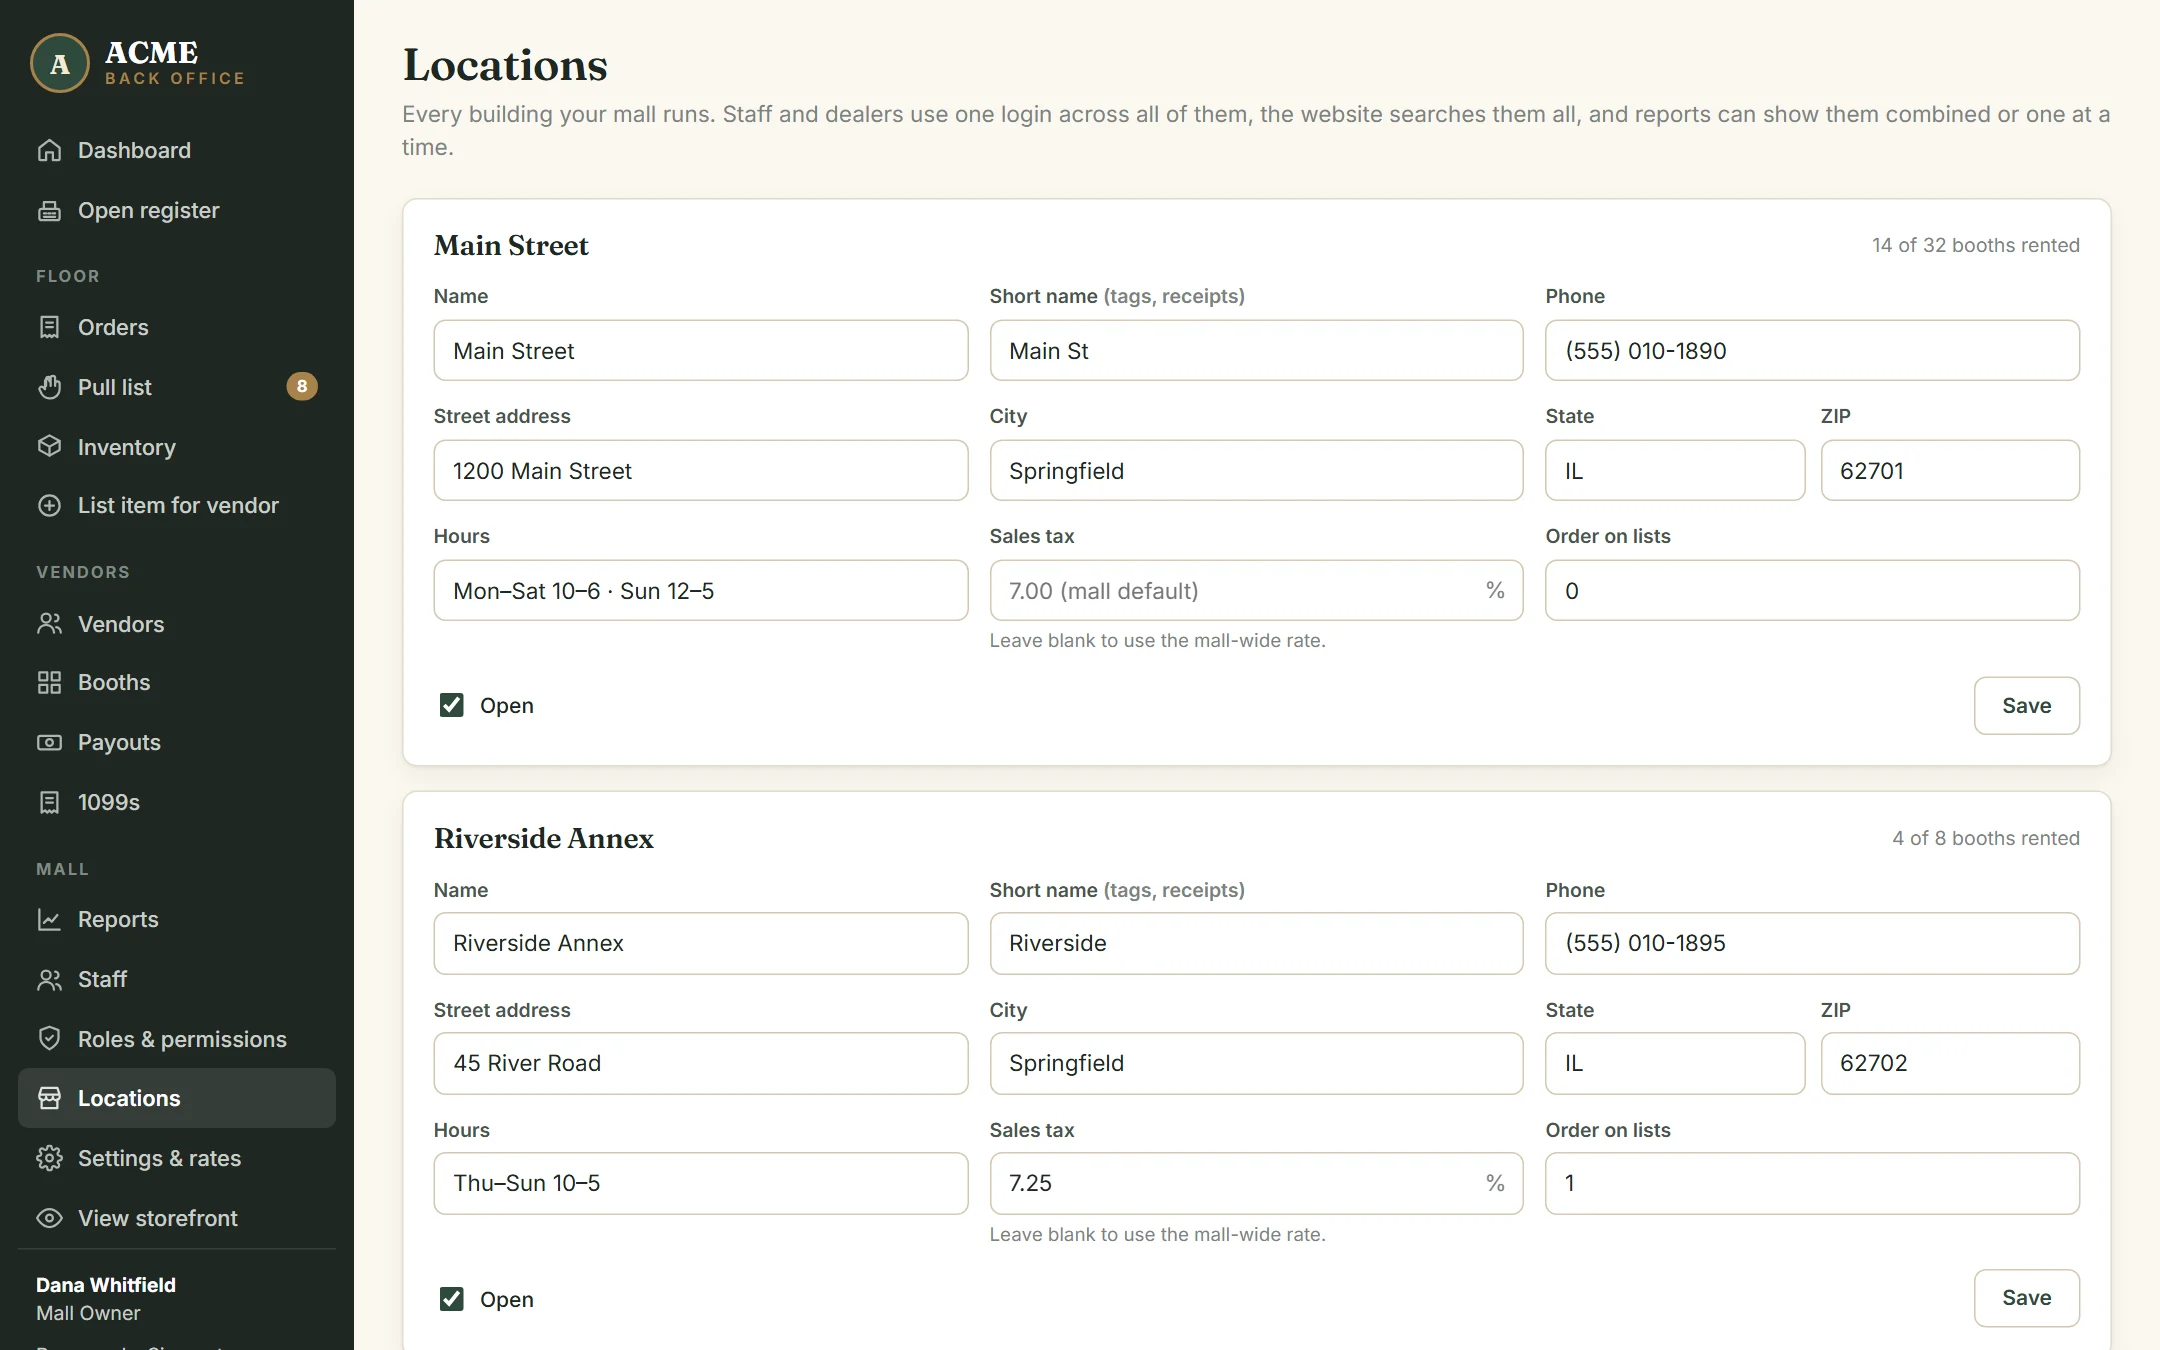
Then add that building’s booths on the Booths page and choose the building for each. A booth code only needs to be unique across the mall — many malls prefix them (R-01 for Riverside).
What changes when you have two or more
| Where | What you’ll see |
|---|---|
| Storefront | Every item shows which building it’s in. Shoppers can filter by location; the Visit page lists each building’s address and hours. Checkout tells a pickup customer which building to collect from. |
| Register | A building picker in the top bar. The register remembers which building it’s in, charges that building’s sales tax, and prints its address on receipts. |
| Pull list | Online sales show their building. Staff who work at one building see that building’s list by default. |
| Orders & inventory | A location filter on both. An online order with items in two buildings shows as “several buildings”. |
| Reports | A By location table side by side, and a location filter for every figure on the page and the CSV export. |
| Dashboard | This month’s sales by location. |
| Payout statements | Each sale shows which building it sold in. |
One login across locations
- Staff sign in once and work anywhere they’re allowed. On Staff, tick the buildings someone works at — leave them all unticked for “everywhere”. A cashier assigned to one building can only put the register in that building.
- Dealers with booths in more than one building have one login, one inventory, one sales history and one payout statement covering all their booths. Booth rent adds up across buildings.
- The owner always works at every location.
Sales tax by building
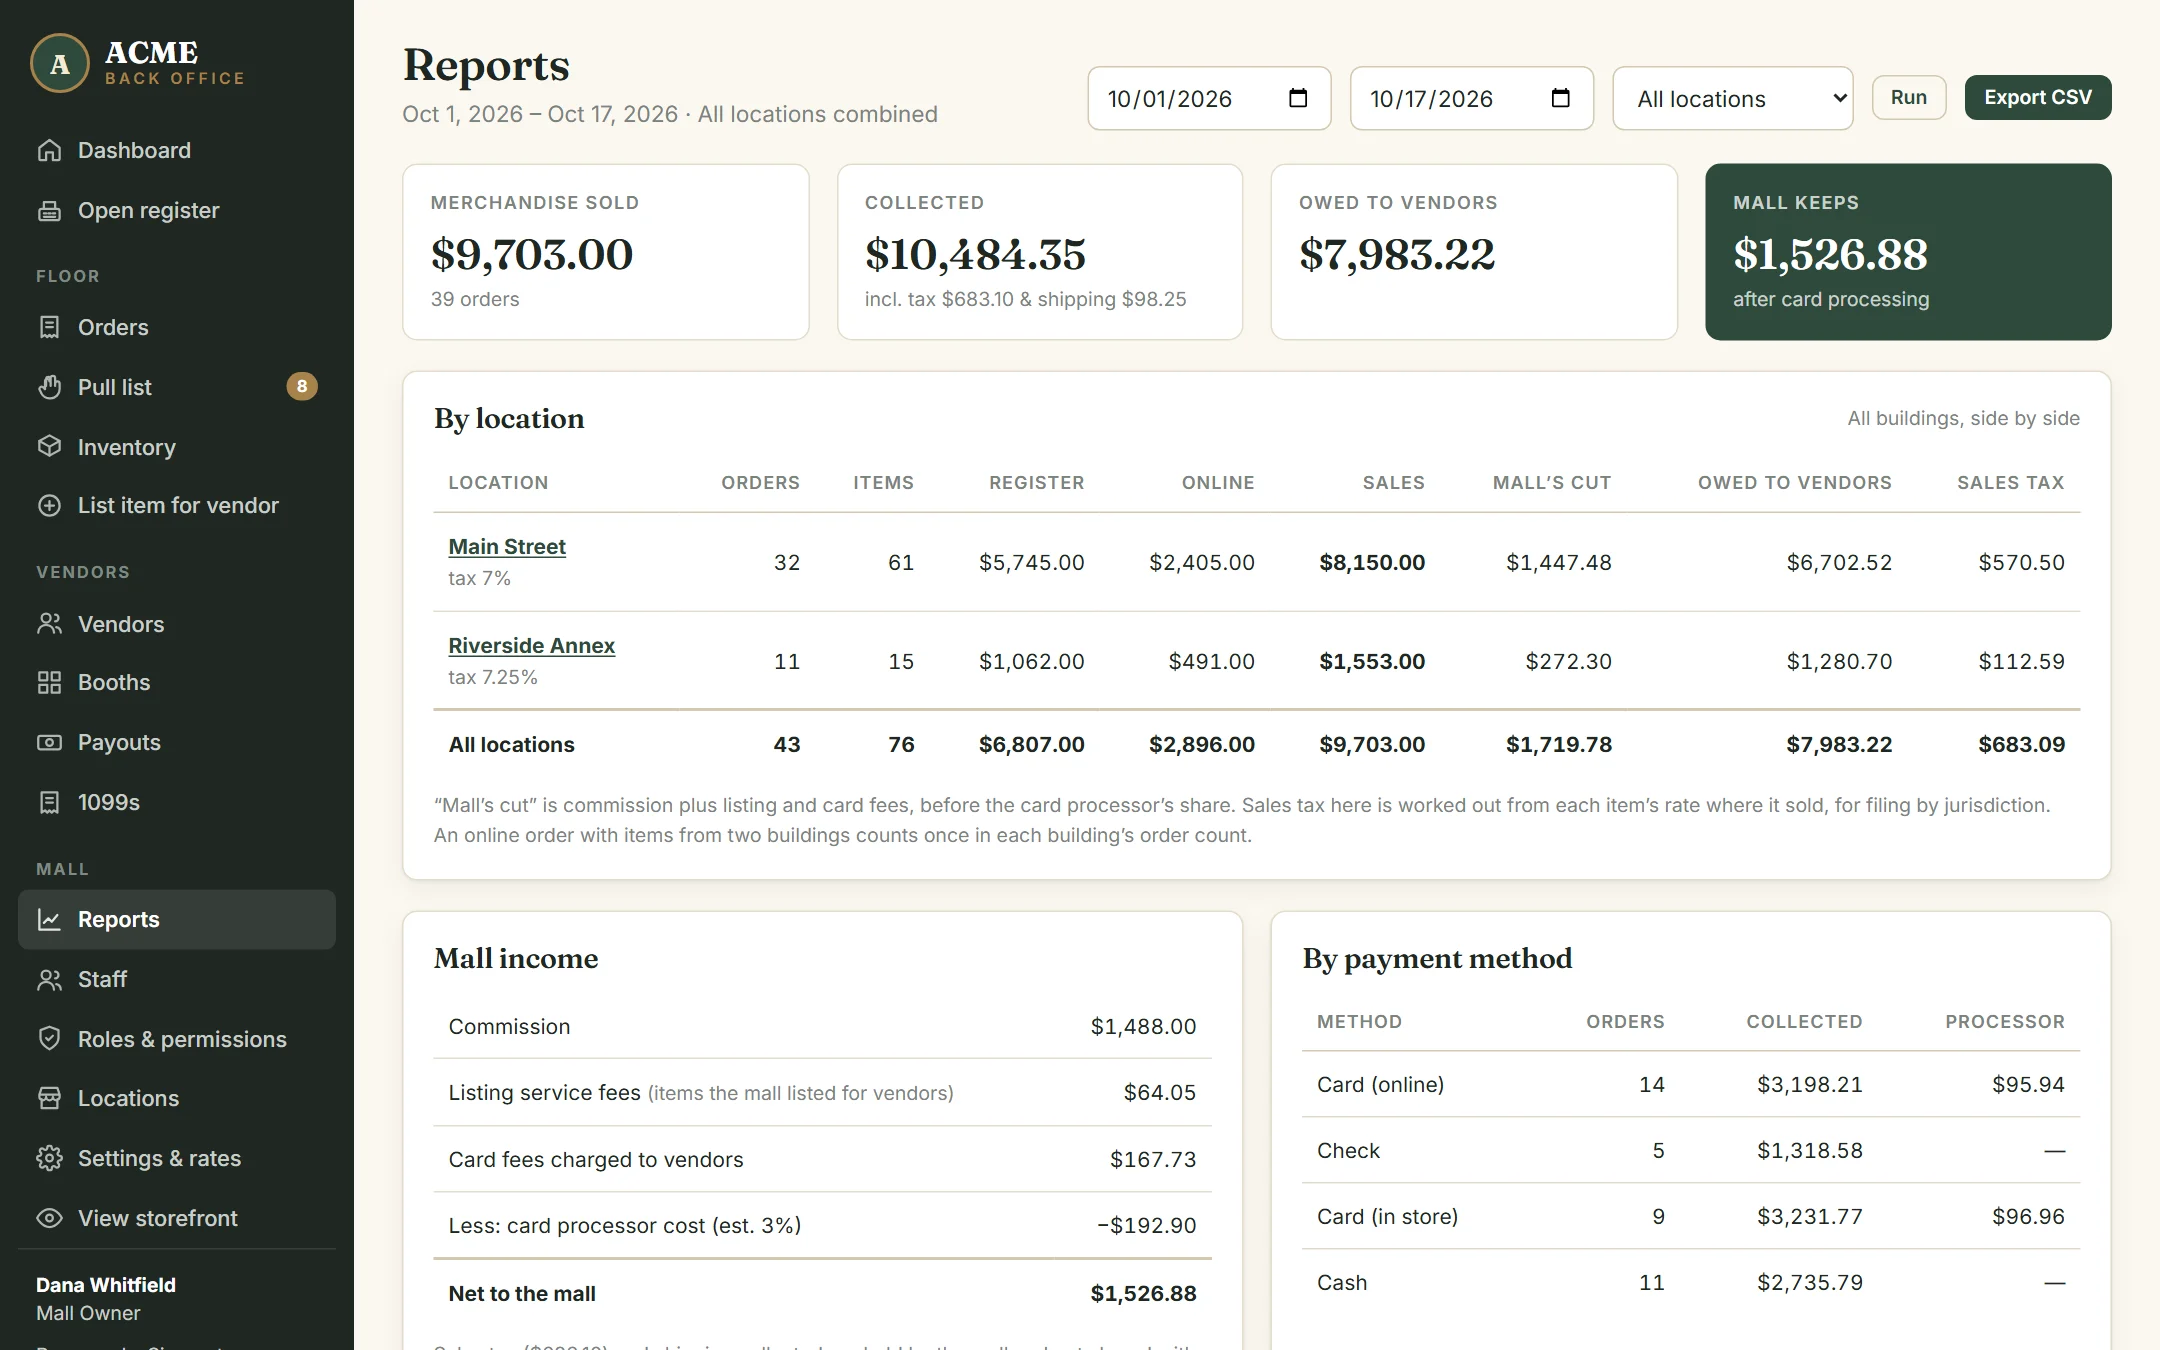
A register sale is taxed at the rate of the building the register is in. An online order is taxed at the rate of the building each item is in — so one order can carry two rates. Every sale line remembers its rate, and Reports → By location shows the sales tax collected in each building, for filing in each jurisdiction. (Which rate applies to shipped orders is a question for your accountant; AllAisles uses the item’s building.)
Combined reporting
Reports opens on All locations combined. The By location table shows each building’s orders, items, register and online sales, the mall’s cut, what’s owed to dealers, and sales tax. Click a building’s name — or pick it from the location menu — to see every figure on the page for that building alone. Export CSV follows the same choice and includes each sale’s location and tax rate.
Closing a location
Untick Open on the Locations page. AllAisles won’t close a building that still has rented booths — move or vacate them first. Its sales history stays in your reports.